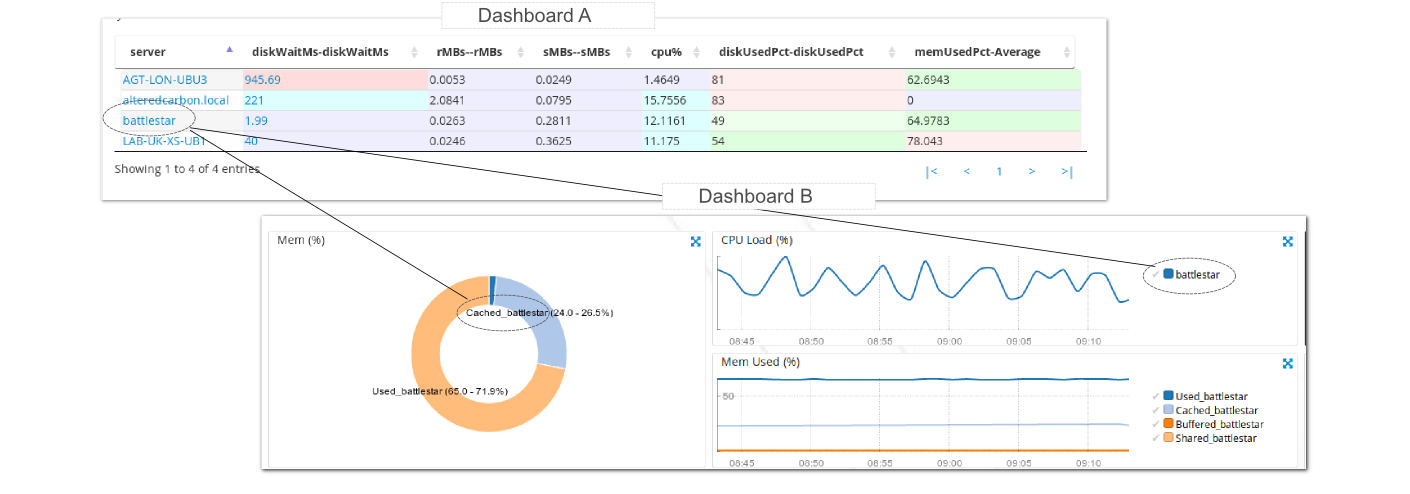
The linking functionality provides a way for non-expert users to browse, navigate and analyse data without needing expert knowledge of the Logscape search syntax. It allows more advanced users to design workflows that make sense for the team, and the data being explored.
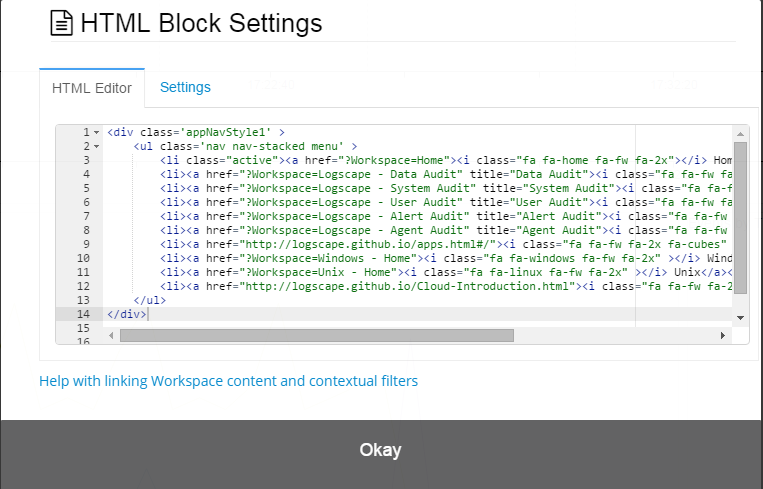
A Linked Workspace will contain a table, as well as two seperate HTML Blocks, below are guides for configuring your set up -
A Linking table is a normal table chart, with some of its values hyperlinked to other workspaces, this can be configured by the user through use of JSON.
Setting up the searchThe following example search will create a table containing system KPI's such as Memory, CPU and I/O utilisation, broken down by the server name.
* | await.max(server,diskWaitMs) rxMBs.max(server,rMBs-) txMBs.max(server,sMBs-) CpuUtilPct.avg(server,cpu%-) FsUsedPct.max(server,diskUsedPct) memUsedPct.avg(server,memUsedPct) chart(table) buckets(1)
The rendered search contains a hyper-link for the server column. When the server name is clicked the Unix - Resources workspace is opened filtering every search on the next workspace with the following expression _host.equals(SERVERNAME)

JSON Config Overview
The table is configured with JSON similar to the line below. The JSON config describes which workspace to open next and what values to use in the filter. While in edit mode, click the chart widget settings and then select the JSON tab.
{column: "server"
	,url:"?Workspace=Unix Resources&filter=$value&filterAction=_host.equals"
	,filterColumn:"server"
}
A link is configured using a JSON array containing the following JSON keys column, url, filterColumn
| Key | Value |
| column | The column is the row that will include the hyperlink. Add an additional column block for each column you would like a hyperlink on. |
| url |
The page to load when the link is clicked. You can specify a normal webpage, link to a search or another workspace. The url syntax accept the following query variables.
|
| filterColumn | The column to extract the value from. |
Below is a multi-column example, it contains hyperlinking for the server and procname columns, both of which link to their appropriate workspaces.
[
	{column: "server",url:"?Workspace=Unix Resources&filter=$value&filterAction=_host.equals" ,filterColumn:"server" }
	,{column: "procname",url:"?Workspace=Unix Processes&filter=$value&filterAction=_pid.equals" ,filterColumn:"pid" }
 ]
The HTML Widget can be used to build links to other workspaces. To make sure that the linked workspace contains the correct context the URL format will need to be used. Here's an example link to the Unix Processes workspace.
<a href="?Workspace=Users&filter=$value&filterAction=_host.equals">Hyperlink Text</a>

Adding a link similar to this in your HTMLWidget will open the next workspace, passing the filterAction and the filter value to the next workspace. When the workspace loads it will apply _host.equals($value) to every search, where $value is populated from your search results.
Parameters can be passed between workspaces by including them in the URL using the format var=value, once included in the URL any HTML block on that page can reference that variable using the $ notation. i.e
yourlogserver.com:8080/play/?Workspace=Home&name=Chris
Any HTML block on your page can reference this variable
<h3> Hello, $name welcome to Logscape</h3>
Note: A variable name must be have both leading and trailing whitespace